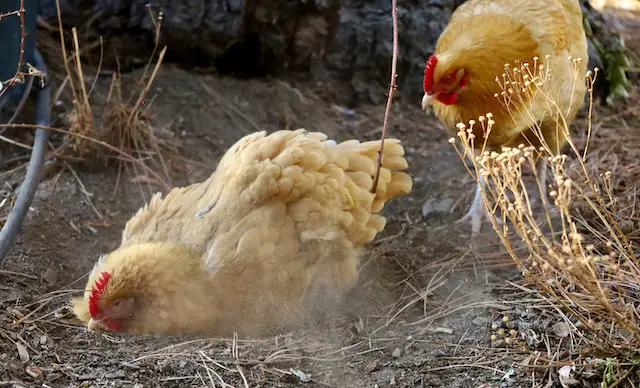
One of the great joys of raising chickens is watching their entertaining antics during dust bathing. But, what is a chicken dust bath? Chickens of all breeds relish rolling and flapping gleefully in dust to clean their plumage and skin. But dust baths serve important functions beyond amusement.
Let’s explore what chicken dust bathing is, its benefits, how you can make the perfect dust bath DIY setup, and tips to accommodate this natural chicken behavior. Get ready to kick up some dust!
What is a Chicken Dust Bath?
Dust bathing describes the behavior where chickens use dust, dirt or sand to clean themselves and maintain the health of their feathers and skin. It involves:
- Digging and scratching vigorously to scatter substrate
- Crouching belly-down and vigorously wiggling in the loose material
- Flicking dirt upward to distribute across all their feathers
- Rubbing their head and neck in the dust to clean hard-to-reach spots
- Flapping wings to work dust into the wing and tail feathers
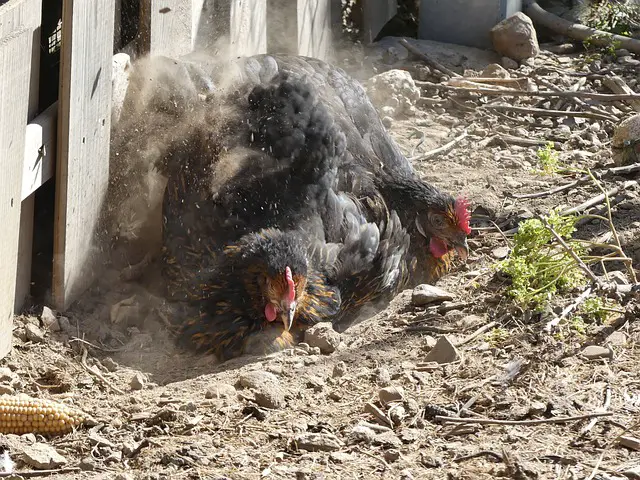
Chickens may pick specific favorite dust bathing locations to return to daily. You’ll see them blissfully remaking dusty “chicken angels” in these dedicated spots. But they will take advantage of any loose, dry material to indulge their dusting instinct.
Why Do Chickens Take Dust Baths?
For chickens, dust bathing serves multiple important functions:
- Removes excess oil and dead skin – Absorbs accumulated oil, dirt, and dandruff from their skin and feathers.
- Deters pests – The abrasive action dislodges mites, lice and other external parasites. Dust clogs tracheal mite breathing pores.
- Balances preen oil – Distributes the preen gland oil across all feathers for protection and shine.
- Thermoregulation – Helps chickens cool down on hot days. The light dust coating improves heat conduction.
- Social bonding – Communal dust baths strengthen ties between flock mates.
- Stimulation – Provides an enjoyable natural behavior outlet for chickens.
- Improves plumage – Conditioning makes feathers more flexible and aligned, aiding aerodynamics and appearance.
By indulging their innate urge to dust bathe, Brahma chickens reap many physical and social benefits with this playful maintenance behavior.
5 DIY Homemade Chicken Dust Bath Ideas
Letting your flock indulge in a thorough dust bath helps maintain healthy skin and feathers. Chickens instinctively know how to create a suitable wallow, but a purposeful dusting station makes this behavior easier. Here are 5 methods to provide an ideal dust bathing area for your homestead chickens.
- Sand Pit Enclosure
A simple enclosure filled with play sand makes an excellent dusting substrate. To set up a sand bath:
- Choose a dry, sheltered spot in the run approximately 3 feet square. Avoid wet areas.
- Use landscaping timbers, boards, or bricks to outline the perimeter. This helps contain the material.
- Fill the enclosure with horticultural grade sand about 5 inches deep. Any sterile child’s play sand will suffice.
- Top off periodically as sand gets displaced. Check for compaction and rake to aerate.
- Consider adding a lightweight cover to protect from rain. Ensure adequate ventilation.
The gritty sand particles scrub the skin and feathers while allowing chickens to dig and roll vigorously. Replace sodden sand as needed to keep the pit dry and loose.
- Metal Tub Dust Station
For a portable dust bath, use a metal or plastic wash tub. Try this method:
- Choose a tub at least 2 feet wide and 4-6 inches deep so chickens can immerse themselves.
- Fill the tub with sand, wood ash, or diatomaceous earth. Aim for 4-5 inches deep, allowing for settling.
- Position the tub in a sheltered area of the run or coop. Elevate on a brick or block to prevent collecting water underneath.
- Check the station daily and top off material as needed after chicken use. Rake flat areas.
- Fully change out the substrate every 2-3 weeks to avoid compaction, soiling, and moisture buildup.
The tub contains the materials for easy scooping. The portable design lets you rotate stations around the coop or run.
- Contained Compost Heap
Chickens will happily dust bathe right on the compost! Containing their activity prevents them scattering too much:
- Construct an open-bottom enclosure from hardware cloth or wood to surround part of the compost heap. Leave at least a 3×3 foot area open.
- Position the enclosure out of blowing wind and rain. Avoid soggy compost.
- Ensure the compost substrate inside the enclosure is loose, dry, and fluffy. Turn and aerate regularly.
- Top dress the reserved bathing area with added dried deciduous leaves or wood ash.
- Monitor for sogginess and remove chickens if compost gets too wet. Fully replace excessively soiled material.
Letting the chickens work over part of the compost pile provides an engaging, dynamic dust bath at no added cost! Just maintain optimal dusty texture inside the space.
- Custom Rock Dust Hollow
For a picturesque option, construct a dedicated rock wallow:
- Choose a level, dry spot and excavate an oval depression approximately 4 feet wide and 6 inches deep.
- Line the hollow with weed barrier or landscape fabric to help keep substrate contained.
- Fill the basin with a combination of loose sand and dry powdered clay. Top dress with diatomaceous earth or wood ash.
- Arrange natural rocks and boulders around the perimeter of the pit. Ensure chickens have easy access.
- Check moisture levels routinely. Remove and replace excessively damp substrate. Rake flat areas.
Lined with rocks and tucked against boulders or logs, this charming dust hollow blends aesthetically into garden beds or yards. The rock border prevents chickens ejecting all the material as they flap and roll.
- Portable Dust Bathing Tub
For a lightweight, movable dust bath, try a plastic trough or tub:
- Use a plastic container at least 2 feet wide and 4 inches deep. Old feed or water troughs work great.
- Drill drainage holes in the bottom to prevent water collecting if positioned outside. Elevate on cinderblocks.
- Fill with a fluffy substrate like peat moss, rice hulls, straw pellets, or shavings 4-5 inches deep.
- Ensure the tub is sheltered from rain. Move inside the coop during wet weather.
- Rake and fluff the materials routinely. Replace any visibly soiled or sodden patches.
Plastic tubs provide durability at low cost. Their portable design means dust bath spots can be moved around the coop or yard. Get creative sourcing the perfect container!
Get ready to watch your flock blissfully rolling, wiggling and flapping in their new handcrafted dust baths! Providing chickens appropriate places to indulge this natural maintenance behavior keeps their skin, feathers and spirits in peak condition.
Creating the Perfect DIY Chicken Dust Bath
To accommodate this important natural behavior, every coop needs a designated dust bathing station. Here are tips for setting one up:
Substrate Material
Find a dry, shaded area at least 2-3 feet square. Position it in a corner or along the exterior of the run. Some chickens prefer privacy, while others like bathing together. Provide multiple communal stations to allow both preferences.
The ideal dust bath substrates are:
- Sand – Any horticultural or child’s play sand works well. Gritty texture scrubs them clean.
- Wood ash – Fine powder smothers mites and absorbs oil. Avoid ashes from chemically-treated wood.
- Diatomaceous earth – Absorbs moisture and deters crawling insects. Ensure it’s food-grade quality.
- Dry dirt/clay – Creates classic wallowing spot. May compact when wet.
Depth
Aim for 4-6 inches deep to allow chickens to immerse themselves fully. Provide enough so they can dig, scatter, and flap. Add lime periodically for a pH balance inhospitable to parasites.
Containment
Use landscaping timbers, bricks or large rocks to outline the perimeter. This keeps the substrate contained even with vigorous use. An optional cover prevents the dust bath from getting saturated by rain.
Maintenance
Top off the bath with fresh substrate as needed after heavy use. Fully replace and sterilize sodden or compacted spots to keep dust baths fluffy. Remove droppings and feathers regularly.
Variety
Consider setting up stations with different substrates like sand, DE powder and wood ash. Chickens enjoy options! Rotate materials to keep curiosity engaged.
By mimicking natural loose soil conditions, these purposeful dust bath areas allow chickens to indulge their instincts fully. Now let’s look at ways to accommodate dust bathing inside the coop too.
Offering Indoor Dust Bathing Areas
Chickens will happily dust bathe year-round whenever the urge strikes. Here are tips for indoor dust bath setups:
- Use a low plastic kiddie pool, concrete mixing tub or shallow litter tray filled with substrate.
- Position near a heat lamp to keep the dust bath warm and dry inside the coop.
- Try peat moss, straw pellets, shavings, or sand indoors – materials that won’t generate excessive dust.
- Hang a dust bathing herb bundle above the station – chickens learn to associate the scent with dusting.
- Add interest by integrating brick pavers or large rocks for Ameraucana chickens to climb on.
- Clean and refresh indoor stations at least weekly to prevent compaction.
- Let chickens work loose substrate into the coop flooring – this allows natural dust bathing behavior to continue.
Monitoring Dust Bath Areas
Keep an eye on your dust bath zones and make changes as needed:
- Fluff flat or compressed areas and top up substrate to maintain light, loose texture.
- Remove droppings regularly to prevent contamination.
- Rake to evenly redistribute substrate after heavy use.
- Check for external parasite infestations, which indicates baths aren’t effectively dislodging pests. Introduce new materials.
- Watch for signs of skin/feather issues that may be impacted by missing dust bath access.
- Ensure all chickens can access the space without competition. Add more stations if needed.
- Rotate substrate ingredients to keep chickens interested.
With attentive maintenance of both outdoor and indoor spots, chickens can get their dusting fix year-round! Now let’s go over the steps involved in chickens’ amusing dust bathing ritual.
The Chicken Dust Bathing Process Step-By-Step
Chickens follow a predictable series of behaviors when indulging in a good dust roll:
- Site selection – The chicken walks the perimeter first, surveying for the perfect spot based on privacy, substrate, and space.
- Digging and scattering – With feet and beak, the chicken vigorously rakes and kicks up the substrate to aerate it.
- Crouching – She squats belly-down with wings slightly extended at her chosen locale.
- Wiggling – Holding wings out, she rubs up and down, rolling back and forth across the dusty surface.
- Wing flapping – While crouched, she rhythmically flaps her wings to work dust into the wing and tail feathers.
- Head rubbing – She burrows and grinds her head into the dust to reach facial areas. Eyes close to avoid irritation.
- Preening – After a vigorous dust session, preening distributes the accumulated dusts oils across all plumage.
- Shaking – A full body shake and feather ruffling further dislodges any caked-on dust.
- Departure – Looking fluffed up and refreshed, she leaves the dust bath satisfied!
Chickens may repeat this sequence several times within one session to ensure full coverage. It’s an elaborate cleaning ritual perfected by birds over millennia!
Why Do Some Chickens Dust Bathe Excessively?
Occasionally, you may encounter chickens that dust bathe compulsively to the point of removing their feathers. Excessive dusting may indicate:
- External parasites – Mites, lice or skin irritation provoke extra dusting to find relief.
- Nutritional deficiency – Lack of minerals and vitamins affect feather health and oil production.
- Behavioral issues – Some stressed or confined chickens self-soothe through obsessive feather picking and dusting.
- Dominant competition – Overly assertive flock mates may drive subordinates out of prime dust bathing spots.
- Inadequate facilities – When dust bath access is limited, chickens overuse what resources exist.
If you notice bald spots, missing feathers, and skin damage from obsessive use, take action to increase bathing areas. Also rule out underlying health issues or behavioral problems causing the overpreening. Most chickens will self-regulate dusting once provided sufficient access.
Why Do Some Chickens Refuse to Dust Bathe?
On the flip side, you may have chickens who resist or ignore dust baths opportunities. Reasons may include:
- Health issues – Arthritis, bumblefoot, or other pain prevents them from crouching.
- Age – Elderly chickens often reduce dust bathing due to joint stiffness or poor balance.
- Broodiness – Nesting hens seek privacy and avoid community areas.
- Low dominance – Timid personalities may be blocked from access by bullies.
- Insufficient materials – Compacted or shallow dust lacks proper depth for rolling.
- Substrate avoidance – Some dislike certain textures like sand.
- Seasonal drop – Dust bathing decreases during molt as feather growth inhibits dust penetration.
If chickens refuse baths, experiment with different substrates and locations. Increase stations to prevent competition. Address any health issues and ensure adequate nutrition. With patience, you can accommodate every chicken’s dust bathing comfort zone.
Signs of Problems with Dust Bath Access
Watch for these signs that dust bathing needs may not be adequately met:
- Plumage appears dull, dirty or matted – Lack of dusting prevents feather conditioning.
- Increased parasites – Mites, lice and other pests take hold without regular dusting.
- Skin appears dry, scaly or irritated – Dust baths distribute protective oils.
- Excessive preening – Chickens over-preen trying to distribute oil and dirt without dust.
- Feather loss, bald spots – Chickens may over-preen areas they can’t properly dust bathe.
- Smaller egg size – Lack of being able to dust bathe causes stress that reduces egg production.
- Increased aggression – Tension arises between flockmates competing for limited dust bath space.
Providing the space, substrate materials, and free access chickens need minimizes these issues. Dust bath deprivation should never be the cause of discomfort or conflict in a flock.
Why Do Broody Hens Stop Dust Baths?
When hens go broody and begin incubating eggs, they stop indulging in communal dust baths. Why?
- Egg protection – A dusty, dirty hen could contaminate the eggs.
- Reduced mobility – Tightly crouching on a nest restricts ability to flap and wiggle.
- Privacy seeking – Broodies isolate themselves from daily flock activities.
- Hormonal shift – Changes in prolactin and other hormones alter behaviors.
- Eliminate scents – Dust and oils could attract predators to the nest.
This avoidance only lasts while actively brooding. Once chicks hatch or the broody spell ends, hens quickly return to habitual dust bathing.
So why not just put out a large pool of water or spray down your chickens with water? Well, lets discuss this and see what works better for your flock.
Dust Baths vs. Water Baths for Chicken Cleaning
When it comes to chicken hygiene and feather care, backyard flock owners have two options – providing dry dust baths or wet water baths. What are the pros and cons of each method?
Dust Bath Benefits
- Loose substrate absorbs excess oil – Dust binds to dirt and dandruff to clean plumage. Sand or DE powder work well.
- Discourages external parasites – The dust clogs mite pores and causes lice and fleas to detach.
- Natural chicken behavior – Chickens evolved to bathe in dirt and ash to clean themselves.
- Social activity – Communal dust baths strengthen flock bonds.
- Thermoregulation – Light dust coating helps chickens stay cool in summer.
- Convenient and low maintenance – Easy to set up a space with substrate.
Potential Drawbacks
- Requires dry, sheltered space – Outdoor dust baths won’t work in soggy climates.
- Can track dust into coop – May need separate indoor bathing station.
- Risk of mites if not fully effective – Must monitor that dust baths fully eliminate pests.
- May irritate eyes – Some particles agitate if gotten into chickens’ eyes.
Water Bath Benefits
- Removes all dirt buildup – Water washes away all accumulated debris.
- No dust generated – Wet baths avoid dusty feathers and respiratory irritation.
- Cooling effect – Water bathing helps chickens keep cool.
- Easier for chickens with limited mobility – Bathing without having to squat and flap.
- Fun activity – Chickens enjoy playing in and drinking bath water.
Potential Drawbacks
- Time consuming – Bathing individual chickens in tub takes extra time.
- Can be messy – Expect wet chickens and splashed surroundings after.
- Risk of chilling – chickens can get cold if not dried thoroughly.
- Won’t suffocate parasites – Water alone won’t eliminate mites and lice like dust.
- Unnatural to chickens – Bathing in water goes against their evolutionary instincts.
Both options work, with dust baths being more convenient and aligned with chickens’ innate behaviors. Water cleans more thoroughly but takes more effort. Providing chickens a choice allows them to select as needed!
The Joy of Chicken Dust Baths!
Now that you know all about this captivating behavior, go watch your feathered friends bliss out in a rejuvenating dust bath! It’s sure to bring a smile to your face. Equipping chickens with designated dusting zones both indoors and outside ensures they can maintain clean, healthy skin and lustrous plumage.
Dust bathing is more than just a silly pastime – it’s a critical natural maintenance behavior. By accommodating chickens’ instinctive urges to bathe in dust, we enable better health and happiness throughout their lives. So kick up some dust and let your flock happily immerse themselves!
